How to Drain a Pressurised Central Heating System
This post may contain affiliate links. At no cost to you, we earn a commission from qualifying purchases.
This guide explains the process of draining down a sealed or unvented (pressurised) central heating system, so you can carry out repairs or maintenance – like replacing radiators or fixing pipework – without worry.
This could save you a good wedge of cash if you know how to do it properly, but if you suspect that there could be a more serious problem, it is advisable to seek professional advice before you start any work.
Related: The Pros and Cons of Electric Radiators
What Type of System do I Have?
You may be unsure of the type of central heating system that your home has, but don’t worry, it’s easy to tell.
An Open System
If you have an older property, chances are you’ll have an open vented system, with a feed and expansion tank in the building’s roof space or loft.
This type of system is open to the environment and lets oxygen enter the system that can contribute to corrosion – because of this, many installers prefer a closed system.
A Closed System
In all likelihood, you will have a closed heating system that doesn’t have a feed and expansion tank but features a condenser or combi boiler.
Many modern condensing boilers will not be suitable for open-vented systems and are much easier to maintain as all of the major components – expansion vessels and pressurisation units – are located in the same place.
Sealed systems will help to ensure cleaner water than an open system and will also help to protect your boiler, meaning your system has a longer lifespan.
So let’s get down to how you can drain the water from a closed system to make those repairs.
Draining Down a Sealed Central Heating System
In a pressurised system, there is no new water being added on-demand – water is only ever added to the system when needed and necessary.
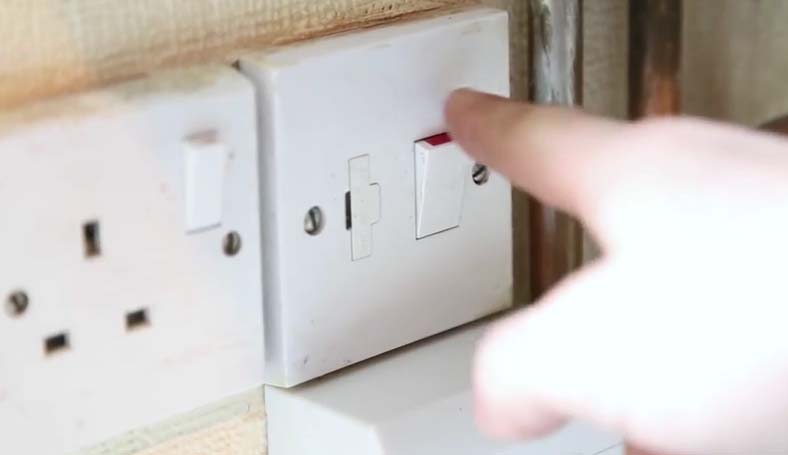
Before you begin, turn off your boiler at the mains power supply and let the water in the entire system cool down.
There are two main reasons for doing this:
- The pressure in the system will be reduced.
- You are protecting yourself against burns and scalds from the internal water.
This means that when you open the drain valve, it will be much more manageable and less likely to cause injury.
Locate the Drain Valve
You will usually find the drain point of your heating system on the pipe work next to the lowest radiator in the house.
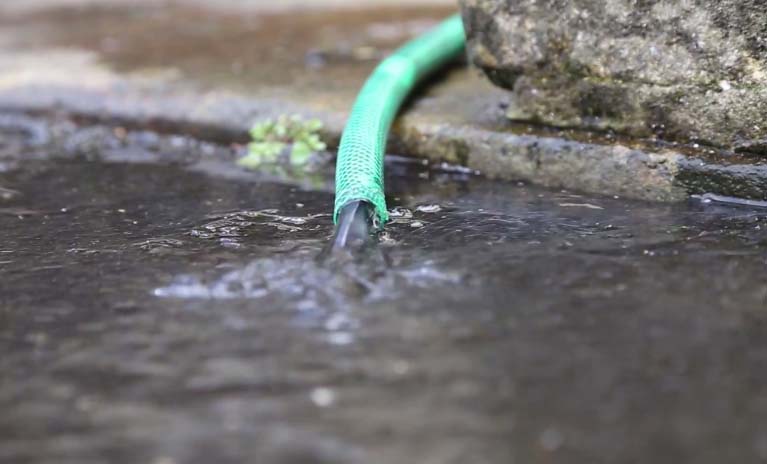
Attach a length of hose pipe to the drain valve and secure it in place with a jubilee clip – this will prevent the hose from breaking loose.

Once you have this in place, take the other end of the hose outside and place it in a nearby drain – avoid draining the water onto grass, as the chemicals in the water may be harmful to plants and family pets.
Place an old towel or a dust sheet underneath and – using an adjustable spanner – open the drain valve by turning it anti-clockwise.
Open the Air Vents
Using a bleed key, open the bleed valves of all of your upstairs radiators.
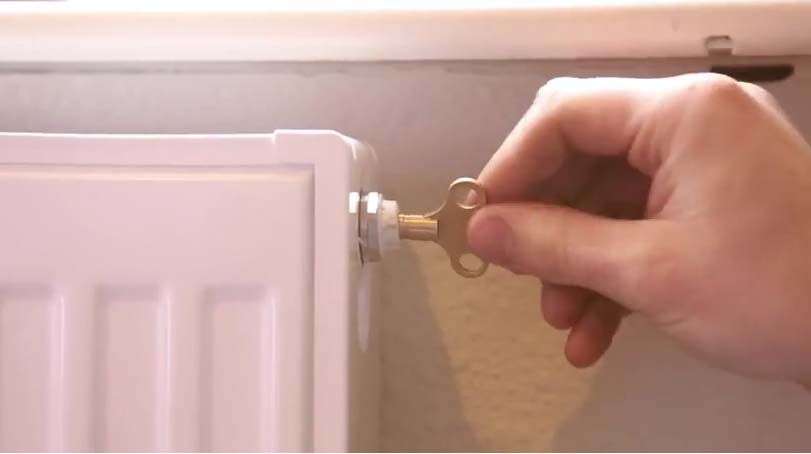
Turning the bleed key anti-clockwise, you should hear a sucking noise as the air enters the radiator – this will help to speed up the process.
Check that there is water coming out of the hosepipe outside and leave the system for 10 minutes before repeating the bleed on all of the downstairs radiators.
Once the flow of water has stopped, your system will be empty and you can start to carry out any maintenance that is required.
PLEASE NOTE – If water is still coming out after 10 minutes have passed, your radiators may be individually piped from upstairs and you will have to drain each radiator individually using each radiator’s drain valve. Just repeat the above steps for each individual radiator.
So There you Have it
Once all of the water has drained away you should be ready to make any repairs that you need to.
It is important to remember that there may still be small amounts of water in some of your radiators, so if you are replacing them be sure to take care when doing so.
Good luck!
Author Bio
John Lawless is a journalist who writes regularly on subjects ranging from home heating and DIY to interior design and money-saving techniques. Read more from John at www.bestheating.com
Photo courtesy of www.sebparkinson.com